1. Prepare a working directory
All the work will take place in ~/squeakvm (/home/lol/squeakvm on my machine):
mkdir ~/squeakvm
cd ~/squeakvm
2. Get squeak-vm source
The easiest part. The VM source code tarball can be found on http://www.squeakvm.org/unix/. At the time of writing, the last stable version is 3.11-3.2135. Go and get it:
wget http://www.squeakvm.org/unix/release/Squeak-3.11.3.2135-src.tar.gz
tar -xvzf Squeak-3.11.3.2135-src.tar.gz
3. Load VMMaker tool
For more explanations on why VMMaker is needed and how it works, here is a good overview.
To generate the source code for your own VM, you need a running Pharo image. Here I use a fresh Pharo 1.0-10508 rc2 image from Pharo website.
Open your image, then load VMMaker by evaluating this in a Workspace:
Gofer new
 squeaksource: 'MetacelloRepository';
 package: 'ConfigurationOfVMMaker';
 load.

(Smalltalk at:#ConfigurationOfVMMaker) project lastVersion load.
4. Load FT2Plugin
UPDATE: Should not be necessary now. See Javier's comment.
To display anti-aliased font of Pharo images, you need the FT2Plugin. To load it:
MCHttpRepository
 location:'http://www.squeaksource.com/FreeTypePlus'
 user: ''
 password: ''.

MCHttpRepository
 location: 'http://source.impara.de/freetype'
 user: ''
 password: ''.
5. Configure VMMaker and generate the VM source
Now you can open VMMakerTool:
VMMakerTool openInWorld
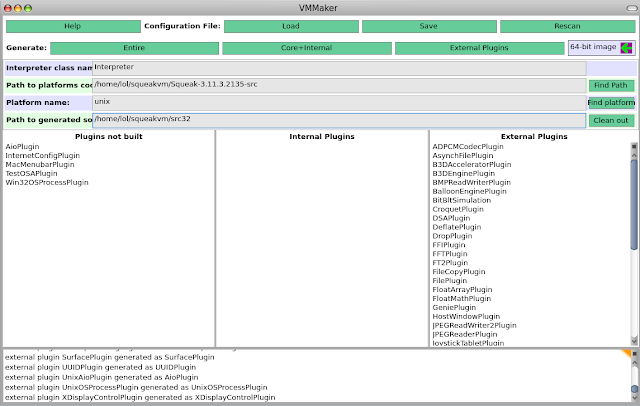
In the Path to platforms field put the path to the extracted Squeak VM tarball: ~/squeakvm/Squeak-3.11.3.2135-src.
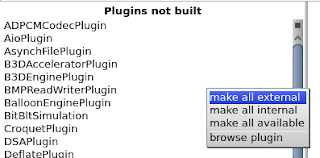
Then right-click on one of the plugins pane and select make all external for a simple configuration.

Note you can have a description of each plugin by reading the class comment.Classes are part of VMMaker-Plugins category.
In path to generated source select a directory where the VM source will be written. Here ~/squeakvm/src32.
The VMMakerTool window should look like this:

Then click on the Entire button (top-left of window). Wait a moment, pray, and the code should be generated.
Finally, I replace the original VM source with the generated one.
rm -rf ~/squeakvm/Squeak-3.11.3.2135-src/unix/src
cp -a ~/squeakvm/src32 ~/squeakvm/Squeak-3.11.3.2135-src/unix/src
Note: theorically this should not be necessary as the configure script accepts an option to specify the source directory path, but it doesn't seem to work.
6. Build the VM
First create a directory for the build and go in:
mkdir ~/squeakvm/Squeak-3.11.3.2135-src/build
cd ~/squeakvm/Squeak-3.11.3.2135-src/build
Then run the configure script
../unix/cmake/configure
First problem. I have this error:
CMake Warning (dev) in
/home/lol/squeakvm/Squeak-3.11.3.2135-src/build/=/CMakeLists.txt:
  Syntax error in cmake code when parsing string

    ${=_link_directories}

  syntax error, unexpected cal_SYMBOL, expecting } (21)
Thanks to this mail there's a patch to correct it.
cd ~/squeakvm/Squeak-3.11.3.2135-src/unix/cmake/
wget http://lolgzs.free.fr/pharo/Plugins.cmake.patch
patch -p0 < Plugins.cmake.patch
Then clean and run the configure script again
cd ~/squeakvm/Squeak-3.11.3.2135-src/build
rm -rf *
../unix/cmake/configure
You should have the Makefile now. Run make:
makeThen another problem as libfreetype (needed by FT2Plugin) is not found. To correct it, create config.cmake for FT2Plugin this way:
mkdir ~/squeakvm/Squeak-3.11.3.2135-src/unix/plugins/FT2Plugin/
echo "PLUGIN_FIND_LIBRARY(FT2 freetype)" >
    ~/squeakvm/Squeak-3.11.3.2135-src/unix/plugins/FT2Plugin/config.cmake
More informations on this error here. UPDATE: See Javier's comment.
Clean and run make again:
make clean
make
Then install:
sudo make install7. Conclusion
The process is not so easy. To help I put all the squeakvm directory (with sources, pharo image with vmmaker) on http://lolgzs.free.fr/pharo/squeakvm.tar.gz
UPDATE: Good post for MacOSX
